computer free courses MS Word , MS Excel , MS Access, InPage , Corel Draw , Windows Installation.

Showing posts with label MS Word. Show all posts

Monday, July 2, 2018

Bullets and Numbering

Bullets and Numbering

With Word, you can make bulleted lists, numbered lists, or outlines.
Bullets and Numbering


In the Home command tab within the Paragraph group click Numbers or Bullets.
A list pull down.

Click the desired Bullet or Number format.


If my posts are useful for you، or if there is any reduction in them so kindly comment me.

Borders and Shading Options Dialog Box Option

Borders and Shading Options Dialog Box Option

Select the paragraph(s) to which you want to add shading and/or border(s)
Borders and Shading Options Dialog Box Option


From the Ribbon, select the Home command tab
Within the Paragraph section, click BORDERS » select Borders and Shading...
The Borders and Shading dialog box appears


If my posts are useful for you، or if there is any reduction in them so kindly comment me.
Sunday, July 1, 2018

Paragraph Shading in MS Word

Adding Shading

Select the paragraph(s) to which you want to add shading
Paragraph Shading in MS Word


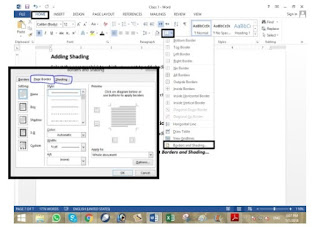
Open the Borders and Shading dialog box
Select the Shading tab
From the Fill pull-down list, select the desired fill effect

Click OK


If my posts are useful for you، or if there is any reduction in them so kindly comment me.

Paragraph Border in MS Word

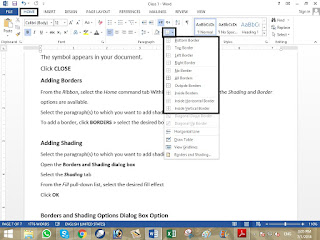
Adding Borders
From the Ribbon, select the Home command tab Within the Paragraph section, the Shading and Border options are available.
Paragraph Border in MS Word


Select the paragraph(s) to which you want to add shading and/or border(s)

To add a border, click BORDERS » select the desired border option


If my posts are useful for you، or if there is any reduction in them so kindly comment me.

Tuesday, June 26, 2018

Inserting Symbols in MS Word

Inserting Symbols and Special Characters

When creating documents, you may need to use a symbol or special character that does not appear on the keyboard. These symbols and special characters can be accessed through the Symbol dialog box.
Inserting Symbols in MS Word


Inserting Symbols

Use the Symbol dialog box to locate symbols, characters from other languages, arrows, and other characters. Symbols inserted into documents can then be formatted as regular text.
Place the insertion point where the symbol will be inserted
From the Insert tab, in the Symbols group, click SYMBOL
Select the Symbols tab
Select the desired symbol
Click INSERT
The symbol appears in your document.

Click CLOSE


If my posts are useful for you، or if there is any reduction in them so kindly comment me.

Monday, June 25, 2018

Custom pages print in MS Word

Specifying the Pages to Print

This section lists options for printing and the selection or specifications that you must make in the Page range section of the Print dialog box to achieve the desired results.
Custom pages print in MS Word
Custom pages print in MS Word 


From the OFFICE BUTTON, click PRINT. The Print dialog box appears.

Select the desired page range, then click print.


If my posts are useful for you، or if there is any reduction in them so kindly comment me.
Printing in MS Word

Printing Options

To use the options described in this document, you must access the Print dialog box.
Printing in MS Word
Printing in MS Word


From the OFFICE BUTTON, click PRINT. The Print dialog box appears.
Click Print.

All the pages in Document are print.


If my posts are useful for you، or if there is any reduction in them so kindly comment me.

Sunday, June 24, 2018

Changing Font Size and Color Dialog box Option

Changing Font Size and Color Dialog box Option
Select the desired text
Changing Font Size and Color Dialog box Option


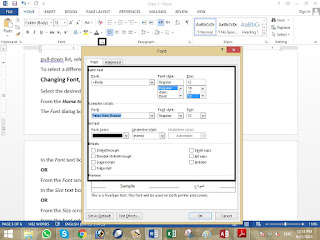
From the Home tab, in the Font group, click Font
The Font dialog box appears.
In the Font text box, type the desired font name
OR
From the Font scroll list, select the desired font
In the Size text box, type the desired font size
OR
From the Size scroll list, select the desired size
From the Font color pull-down list, select the desired font color
In the Effects section, select any additional font effects
EXAMPLES: Small caps, Superscript, Subscript

Click OK


If my posts are useful for you، or if there is any reduction in them so kindly comment me.

Changing Font Size and Color menu option

Changing Font, Size, and Color menu option

Select the desired text
Changing Font Size and Color menu option


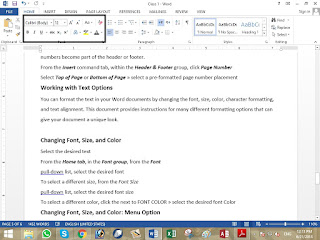
From the Home tab, in the Font group, from the Font
pull-down list, select the desired font
To select a different size, from the Font Size
pull-down list, select the desired font size

To select a different color, click the next to FONT COLOR » select the desired font Color


If my posts are useful for you، or if there is any reduction in them so kindly comment me.

Saturday, June 23, 2018

Insert page number in MS Word

Numbering Pages

Word lets you easily enter page numbers in your document by using the Insert command tab. Page numbers become part of the header or footer.
Insert page number in MS Word


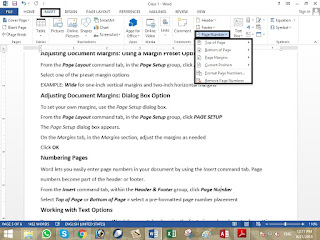
From the Insert command tab, within the Header & Footer group, click Page Number

Select Top of Page or Bottom of Page » select a pre-formatted page number placement


If my posts are useful for you، or if there is any reduction in them so kindly comment me.

Adjust margins through dialog box

Adjusting Document Margins: Dialog Box Option

To set your own margins, use the Page Setup dialog box.
Adjust page margins through dialog box


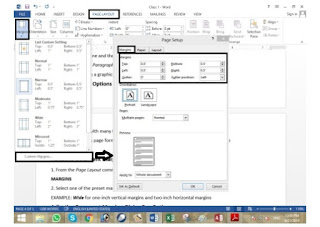
From the Page Layout command tab, in the Page Setup group, click PAGE SETUP
The Page Setup dialog box appears.
On the Margins tab, in the Margins section, adjust the margins as needed

Click OK


If my posts are useful for you، or if there is any reduction in them so kindly comment me.

Friday, June 22, 2018

Using a Margin Preset Option

Adjusting Document Margins: Using a Margin Preset Option

From the Page Layout command tab, in the Page Setup group, click MARGINS
Select one of the preset margin options
Set Margin Preset Option


EXAMPLE: Wide for one-inch vertical margins and two-inch horizontal margins


If my posts are useful for you، or if there is any reduction in them so kindly comment me.

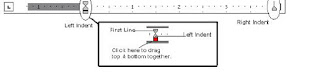
Working with Indents

Working with Indents

Word offers three types of indents: normal indents, first line indents, and hanging
indents. A normal indent inserts a specified amount of space between the page margin
and all of the lines in a paragraph. A first line indent inserts space between the first line
and the page margin so it looks like a tab was used. A hanging indent uses a normal
indent for the first line and then moves subsequent lines farther to the right.
Working with Indents


Instead of using the Paragraph dialog box, you can make indent adjustments using the

Ruler. Shown here is a graphic of the Ruler.


If my posts are useful for you، or if there is any reduction in them so kindly comment me.

Thursday, June 21, 2018

Adjusting Line Spacing in MS Word

Adjusting Line Spacing
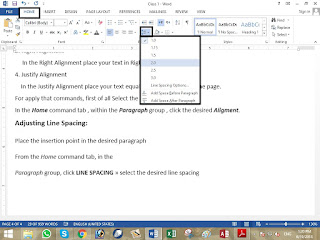
Place the insertion point in the desired paragraph
Adjusting Line Spacing in MS Word


From the Home command tab, in the

Paragraph group, click LINE SPACING » select the desired line spacing


If my posts are useful for you، or if there is any reduction in them so kindly comment me.

Paragraph Alignment in MS Word

Paragraph Alignment

Alignment means place the text in the page side.
There are Four alignments in MS Word.

Paragraph Alignment in MS Word


1. Left Alignment
    In the left Alignment place your text in left side of the page.
2. Centre Alignment
    In the Centre Alignment place your text in Centre side of the page.
3. Right Alignment
     In the Right Alignment place your text in Right side of the page.
4. Justify Alignment
    In the Justify Alignment place your text equal right and left side of the page.
For apply that commands, first of all Select the text.

In the Home command tab , within the Paragraph group , click the desired Alignment.


If my posts are useful for you، or if there is any reduction in them so kindly comment me.

Tuesday, June 19, 2018

Document themes in MS Word

Document Theme

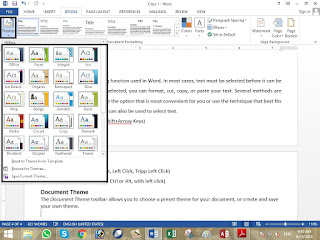
The Document Theme toolbar allows you to choose a preset theme for your document, or create and save your own theme.
different text styles in MS Word


In the Design command tab within the Theme group click Theme option.
A list pull down

Select the desired theme.


If my posts are useful for you، or if there is any reduction in them so kindly comment me.